Weekend Reads

Saturday, June 17, 2017


Happy weekend, friends!  Saturday mornings are typically the one time during the week when I don't feel guilty sitting down and catching up on my favourite reads.  So I thought, why not share what I'm loving with you each Saturday!  With that, welcome to the first edition of "weekend reads" sprinkled with a few favourite moments from our week!

One of my favourite bloggers, Julia, is currently on vacation in France.  I'm loving this post and all of her insta stories and photos!

Studio McGee recently shared a home reno and it's out of this world!

Looking to improve your photography skills, then be sure to read this post!

This is an old post, but I spotted one of the photos on Pinterest and it completely reeled me in!

I love love love how Courtney's curtains turned out!

Just love Amy's fashion sense and this outfit has me wanting to try off-the-shoulder tops again!

We had the incredible opportunity to see a preview screening of Cars 3 thanks to Canadian Tire.  The kids absolutely loved it (and we did too!).  If you love the Cars series, I think you'll just love this one too!


A few more shots from this week:


The rain did a good number to our peonies, I brought the last bunch in and now I'm patiently waiting for our hydrangeas to bloom!

Have a fantastic weekend!

Cheers,

SaveSaveSaveSaveSaveSaveSaveSaveSaveSave
SaveSave

Whitewashed Vintage Dresser

Sunday, June 11, 2017


A few years ago I decided to paint a vintage dresser that we received from my mother in law, white.  I wanted to use the dresser in our master bedroom, so painting it white was a way to make it work in the space (and I was totally on board the "paint everything white" train at the time! ha!).

After our master bedroom makeover, I decided to move it to the main floor hallway for storage.  The dresser looked great white (I am still trying to find a good picture of it!), but you can see a bit of it in this photo:


Though the white was good, I wanted the piece to stand out a bit more, but not too much.  I decided it was time to sand it down and try to restore it to it's original glory.  After sanding off the white paint (one of my least favourite jobs) using 60 grit sandpaper (be careful, this is coarse sandpaper so you don't want to apply too much pressure or it could ruin the wood), I chose to stain it with a medium stain.  It didn't look good at all!  I brought the dresser inside just to confirm that it wouldn't work and alas, my gut was right.

So then it was on to plan B, which I didn't really have at the time.  That being said, I'm currently craving warmth and brighter colours in our house, so the idea of bringing a bit of Provence came time mind after being inspired by photos of Julia Engel's trip to France.

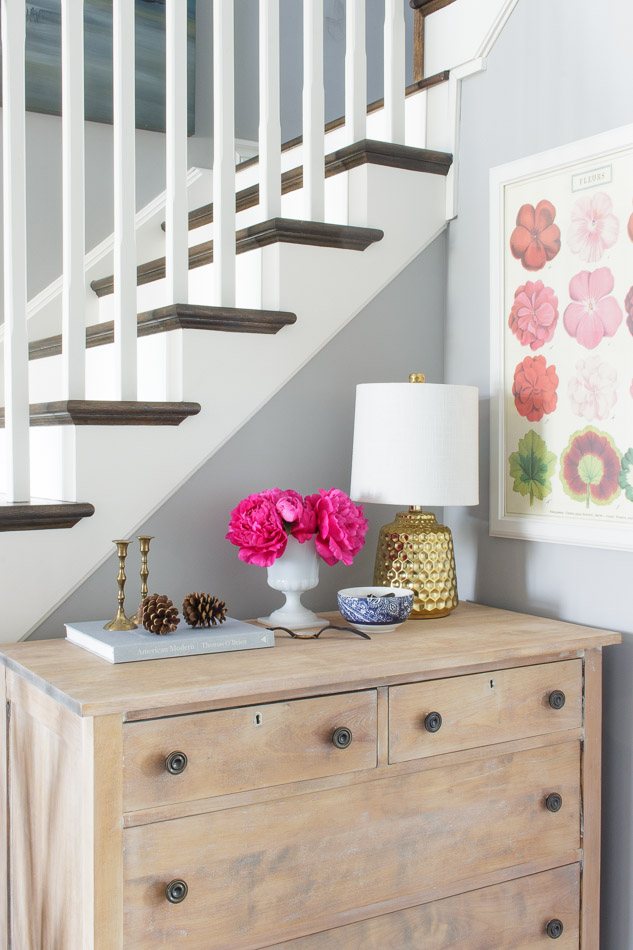
The problem was that for the first time in I don't know how long, perhaps ever, I really didn't want to paint the piece.  After a little brainstorming, I decided to attempt a whitewash for the very first time and the end result is absolutely wonderful!

For the whitewash I first applied a natural stain to the wood.  After that dried I mixed water with Iqualuit Road from Canadian Tire's Premier Paint line. I had picked up a sample of this colour when I was testing colours for the family room makeover, it was a great way to use up the rest of the sample.

I brushed on the mixture (which was more water than paint, at least a 3:1 or maybe even 4:1 ratio for the look I was going for) with a paint brush and then quickly wiped it off with a cloth before it dried too much, which would make it more difficult to wipe off.

I would repeat these steps until I got the right look.

TIP: If you find that you aren't getting enough white, add more paint to the mixture, if it's the opposite, if it's too much white, add more water to your mixture.  You can always sand down parts that are a touch too white, which is exactly what happened to me in the beginning.  I recommend that you start on the back or side, an inconspicuous area to test your mixture out.

I really wanted to be able to still see the grain of the wood, which is why I used more water than paint in my mixture.  If you want the opposite, to cover the grain and see less wood, switch the ratio around.


Something else I'm pretty excited about: peony season!  Our peony bushes are all in bloom right now and I'm loving it!  We planted a few more last year, which means that I'm able to clip some flowers to bring in the house without leaving the gardens completely bare!  The colour of the ones in these photos is just unreal!


You may have noticed a new poster hanging above the dresser.  I've had my eye on this poster for months and finally purchased it a few weeks ago.  You can find it here!


This was my first time ever whitewashing a piece of furniture and I have to say that I love the look!  I really like how you can see the grain in the wood and how the detail stands out more and how it has character and a worn look.  Some of the white paint still shows, that's another detail that I'm fond of.

It's great how you can totally customize each piece when applying a whitewash simply by selecting the right white or grey paint and adding as much or as little water as needed.  There are quite a few methods out there, but this is the one that worked for me!

Cheers,

SaveSave

Family Room Makeover Using Premier Paint

Thursday, June 1, 2017


You guys, I'm not so great at keeping secrets, but have learned that some things are better left as a surprise.  A few weeks ago, I was asked by Canadian Tire if I would be up for transforming a space using paint from their new line, PREMIER.  I immediately jumped at the opportunity because I had already planned on a doing a room makeover that required paint.

Which room you ask?  The family room.  In all honesty, this room has kind of been a thorn in my side for the past few years.  It's always felt "off" and it wasn't until recently that I realized the reason why.  The paint.  It's just not right for this room and for that reason, the timing for this project couldn't have been any better!

Now something that completely took me by surprise was how much my grey loving heart was leaning towards....wait for it.....beige!  Yes, beige!  If you told me a year ago that I would be contemplating painting our family room beige I would have laughed so.darn.hard.

But alas, Butter Beige was the winner (I also tried Iqaluit Road and Polar White, but as soon as they were on the wall, I knew that Butter Beige was "the one").

I chose to use Premier Infinity for this project because it was going over a dark grey.  The paint and primer combo is such an incredible feature.  I applied two coats, waiting the four hours between each coat.

Here's the before:


And here's how the space looks now!


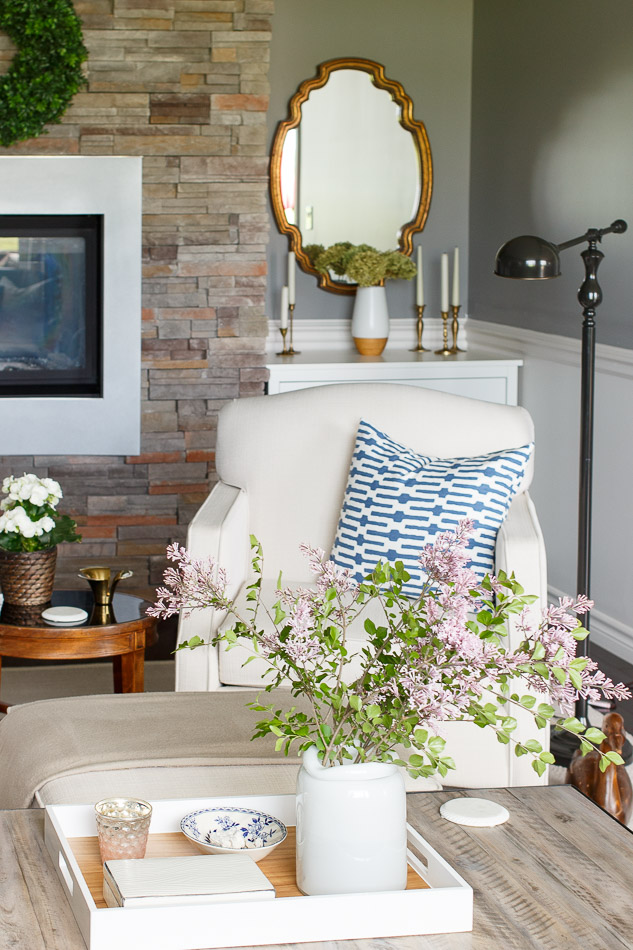
I chose to only paint the bottom portion of the wall and separated the two colours with a chair rail (36" from the floor as we have 9' ceilings and used the tools from this post to install the chair rail).  I love how the new paint adds just enough warmth and brightens up the room perfectly!

I honestly can't believe how one can of paint (that's all it took for this project) can completely transform a room!  It's got to be the best way to give a room a new look.

Here's a closer look!


I think what surprises me the most is how there is definite colour when you look at Butter Beige on the fan deck, but once it's on the wall, it's hard to tell that it's not white unless you have is placed against something that is true white.


I also painted the existing frames with the same paint!  For that, I used a foam brush and it worked perfectly!  Again, I applied two coats and the new look suits the room!


I'm truly so happy with how this room makeover turned out!  I already have plans to update a few other rooms.  To be honest, I also consider painting the room a gooooorgeous green!  If you're in the market for a stunning shade of green, be sure to check out Mountain Green, such a pretty colour!

Cheers,

This post is written in partnership with Canadian Tire, however all opinions are completely my own

The Outdoor Extravaganza Link Party!

Friday, May 26, 2017

I have to say that it's been so fun taking part in this year's Outdoor Extravaganza party!  It's given me the kick I needed to tackle our patio!

Now it's time for you to share your outdoor creations with us as part of the Outdoor Extravaganza link party!  If you have a post that's related to gardening, entertaining, outdoor diy's then we'd love for you to join in on the fun!

As a quick recap, here are the posts that I've shared as participant in the Outdoor Extravaganza!

Week 1


Week 2


Week 3

DIY Mosquito Repelling Planter Box


Ready to share your outdoor related post, new or old?!  Please note that by entering the link up party, you're giving us permissions to feature an image on our blogs and/or social media channels (of course, proper credit will always be given).   Please post to a specific page featuring your own work, not your homepage, so that it's easy for everyone to see what you've been up to!  We do ask that you don't share links that promote a giveaway, other link up parties or shops, thanks in advance for your cooperation!

Okay, click the link below to join in on the fun!


Be sure to use the hashtag #OutdoorExtravaganza when posting on social so that we can see!

Cheers,
 

© 2010-2014 Julie Shaver. All Rights Reserved. | Policies | Blog Design By Brittany Douglas