It's How We Get There *CLOSED*

Wednesday, September 29, 2010

**this giveaway is now closed**

I've reached a small goal (yay).

When you have a plan, when you have a vision, it's so important to have goals.  Goals are what make you work hard.  For me, reaching this goal means that

I'm doing something right

I'm going to keep this goal to myself (for now), but I want to celebrate by sharing one of my creations with a lucky one of you!  Yay for giveaways!

Up for grabs: 


Ruffled Fabric Stationery Set (four)

What I will say is.....

thank you!  

Many thanks for all of your support, for reading along and for keeping in touch! Love it!

Giveaway open until 11:59pm EST Wednesday, October 6th.  Open to everyone!  Just leave a comment with this post, that's it, that's all!

And I have to mention, for those of you who love dance, you must check this fabulously choreographed piece by the lovely richelle jean over at richellelephant loves....

Cheers,

Back To Where It All Began

Monday, September 27, 2010

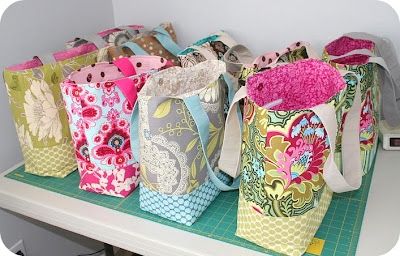
I'm not sure how many of you were aware of this, but when I first opened up my Etsy shop, I had intended on selling totes.  It's true! Take a look:

(I sold these at my very first craft show!)

I never listed any.  To be very honest, I was scared off by the shipping, silly, I know but true story.

I dabbled in a few things, here and there, and soon discovered that creating fabric accessories was my passion.  


I continued on….


I now offer the stationery line, which again is a passion.  That being said, there has always been a little bit of me that has wanted to make some type of bag again but I couldn't decide on what style it was that I wanted to make.  Until the other night, when I had a dream of the perfect item.  I've been working on prototypes ever since.

Take a peek:


the elliven clutch


I'm hoping that they will make their debut at the Craft Show.  They still need some tweaking and something is just "not right" yet, but all in all, I'm happy with the direction they're heading (hopefully there isn't a cardinal rule about showing something off before it's completed).  


I plan to offer different embellishments, ie ruffle, decals and straps, but the main design won't change other than size (small, medium, large).

what do you think? could you see yourself carrying this style of clutch?

Cheers,

What I've Been Up To

Wednesday, September 22, 2010


My poor little shop hasn't been updated in quite some time, I know.  I promise though, I have been working on items.  I've decided to hold off on listing them because my main focus for now is the upcoming craft show.

Once I have all of the stock sewn together, I will pick and choose some to list in the shop, and then after the show is over, any remaining items will also be added.

Here's a peek at a portion of my inventory:

(iPod sleeves, mini wallets, receipt holders and notepad holders)
ruffle stationery including holiday sets
What have you been up to?

Cheers,

Six Amazing Years!

Tuesday, September 21, 2010

Six years ago I was introduced to the amazing world of motherhood!


Happy Birthday Big Guy!


Cheers,

Pleased To Meet You

Wednesday, September 15, 2010

we have a dog....

his name is Hyatt...


he's a boxer, he's our buddy...


he loves to sunbathe....


I feel safe with him in our house, which is a great thing when your husband is often away...


I enjoy jogging with him, just the two of us, it's our thing....


he checks on each and every one of us before going to bed at night...


he's a lover, not a fighter


(that's Hyatt at the bottom of the pile)


he's a mushy dog, a cuddly dog, my fourth child


love you Hyatt!

Cheers,

Birth of a Stationery Line

Saturday, September 11, 2010

Someone asked me the other day why I decided to start a stationery line since the main focus of my shop has always been fabric accessories. At first, I was slightly stunned by the question. Not because I thought it was silly, but because I was surprised that she didn't know. Then it dawned on me,


I never have shared the story of why I started this new line of mine.


So here we go….how elliven stationery came to be.


My husbands grandmother who lives in Ottawa doesn't own a computer, so she never receives the email updates we send so often about our little family. She's so sweet, and is always sending cards/letters to update us how things are going with her and to let us know what she has been up to. I love her to bits! I then reply with an update on how we are doing here in Winnipeg. I truly enjoy this little game of tag we have, sending cards back and forth, updating one another the old fashion way, by sitting down, grabbing a pen and paper and writing.


One day, I wanted to write to say hello, and the only card I had was a "thank you" card for a baby shower! Hmmm, well, that wouldn't do would it? I brainstormed a bit, dug through a few of our desk drawers looking for something to write on, but came up empty handed. I always love to write my letters to her on pretty stationery……then it dawned on me, why not design my own stationery set? Something unique, something that would put a smile on her face when she opened the envelope, something unexpected…..ah-a, fabric! I went to the studio, tried a few different designs out, one of them being a fabric ruffle….I loved it!


The feedback was fabulous! I had no intentions on making it a line in my shop, I simply wanted something for my own, personal use. I continued to receive comments on the cards and that's when I thought that perhaps they would be fun to add to the shop. I decided to make a few envelopes to match, and proceeded to mail them to myself to see how they would hold up…..I literally gasped when I opened the mailbox and saw the pretty envelope sitting there. That truly gave me the extra push I needed to move things along.


I wanted to make others smile, to take their breathe away,


to make them feel the same way I felt when I first saw the ruffled envelope sitting in the mailbox


I wanted to encourage people to start mailing notes and cards out to friends and family again, to take the time to connect other than through an email (I admit, email is convenient and I use it more than a lot, however, I do believe that there truly is nothing like receiving a piece of mail addressed to you…..such a sweet and simple way to make someone smile…..it really and truly is).


And that my fellow friends, is how the elliven stationery line came to be, in a nutshell of course! I can't even begin to tell you just how much joy I get from making the stationery line. I have many more ideas that I have yet to try out, I can't wait to explore this avenue a little more.

Cheers,

all sets pictured are currently available in the shop

Pine Cone Love

Thursday, September 9, 2010

hello!


Since I've already begun speaking of fall, cooler temps and the upcoming holidays, I figure I might as well keep on going!


Every year I always get excited when the stores stock scented pine cones on their shelves. I can't wait to get my hands on them and to place them neatly in a lovely bowl near our front door. Their scent just screams holiday, festivities, joy and happiness (yes, all of that from a bowl of scented pine cones).


I am thinking that this year, the kiddos and I should make our own. The boys absolutely LOVE picking up pine cones when we are out on walks as a gift for mum. At first, I couldn't figure out why they chose pine cones as my gift, but then I realized that if you look around our house, there are bowls of pine cones in a few of the rooms. Even though the smell doesn't last all year round, I still love the look of them stacked in a tall glass vase, or placing them in a silver coin bowl on a side table.


I've been looking around online, scouring recipes, and as I thought, many of them simply say to use cinnamon. While looking for these recipes, I discovered some other brilliant ways to display these lovely smelling holiday decorations and I wanted to share them with you!
  • this tutorial is simply fabulous....a lovely pinecone garland to hang in a special place in your home
  • what a great way to use your old, broken crayons! eco-friendly holiday style!
  • attach the pine cones to your favourite wreath for a special welcome to guests when they arrive at your door
  • add some pieces from your christmas tree to a bunch of pinecones and display in a glass bowl
  • a little dried orange peel can add colour and a lovely, fresh scent
I'll be sure to post some pictures of our project once complete!

do you have a love for scented pine cones like me? (please say yes!)

Cheers,

all photos were taken by myself

Simple Yet Fun - A Tutorial

Friday, September 3, 2010

I absolutely love tutorials! I can't get over how talented people are and how many fabulous ideas there are out there! Being that I'm a lover of tutorials, I thought I should perhaps start sharing some of my techniques/ideas for making items.

So we'll start with a short, simple tutorial. One for decorating packages, be it for shipping items from your Etsy shop or to use when wrapping a gift for that special someone.

I think it's fair to say that there is nothing like receiving a beautifully wrapped gift. I love, love, love taking the time to decorate orders from my shop. I always include a special note to the client and then wrapping each and everyone one, one at a time. I just truly appreciate people taking the time to peruse my shop and ordering items from me.

Okay, on with the tutorial....

decorative tissue band - a tutorial

What you'll need:
  • tissue paper
  • cutting tool
  • ruler
  • edge punch (I am using the Martha Stewart doily/lace edge punch....the double edge would be great here too, or even decorative scissors would work)
keep your tissue paper folded up (or fold it a few times if it isn't folded when you purchase it...it's just easier....but do make sure it's not too thick, you'll see why in a bit)

measure the width you'd like your strip to be and cut a straight line (I've chosen 1.5")


this is what you'll end up with:


next you'll need your decorative edge punch


I just love this little tool! I use it to edge the personal cards I write to clients. I think mine needs to be sharpened, I've read to punch foil wrap and that will sharpen the edges for you, I have yet to try it though. This is what the bottom looks like


next, you want to feed your strip of tissue paper through the edge punch....this is where you'll need perhaps a lot a little patience....the tissue paper can get stuck in the teeth of the edge punch...have no fear, simply pry it out gently (this only started to happen to me recently, which is why I think the teeth are getting a little dull). Just make sure that the tissue paper stays lined up nicely so that the holes aren't all uneven.


here is the strip after you've finished with the edge punch....


open it up to reveal your single strips

now, what to do with it? good question!

I personally like to wrap it around the bags I use to package my items after wrapping them in tissue paper, like this (I use double sided tape to stick it on)


or this (in this pic I have cut a 2" strip with blue tissue paper for more of a contrast on the white)


then you can add some fun and lovely washi tape (loooove washi tape) on the back of the bag to seal it shut perhaps? (a white strip of 1" tissue is used in this pic), add your stamp to the front for extra detail, or even stick a paper doily under the strip of tissue to add a little something


cut loads of different widths and colours for a fun and decorative way to package your items


Use some of these to wrap around boxes that have been wrapped up in kraft paper maybe? Oh several different colours/sizes all wrapped around in a row? You can really let your imagination run wild! I've used a simple display on how to use these strips (I do add a little more to the package if I find that the decorative tissue strip isn't enough)....really, they are loads of fun (especially when you have to clean up the small dots of tissue paper that the edge punch leaves behind!), and quick and easy to make.

I hope this has give you some inspiration/ideas! If you use this, please take pics and leave a link here for me to see! Feel free to share this tutorial with friends and family! Oooooh, Christmas presents all wrapped up with holiday coloured tissue!!! Love it!

Cheers,

We're Getting There

Thursday, September 2, 2010

The past few weeks have been full of working towards revamping, renewing and re-opening my shop. I'm happy with the progress so far, but my gosh, is there ever a lot of work to still do!

I am happy with the new items I've listed (stationery) and I'm thrilled with how the Receipt/Coupon Holders and Mini Wallets I'm working on are coming along.

(all items pictured available in the shop)

I'm also beginning to look into how to market my items. What steps to take next and how to be professional about. I'm reading, researching, and jotting down notes. There sure is a lot to know. I'm pretty embarrassed about how I used to approach bloggers about purchasing an ad space from them, and wish I could retract the emails and send them out again.

This is kind of a steep learning curve and I'm finally figuring that out....kind of wish I had figured this out sooner rather than later though.

Thinking of the future of my shop no longer scares me, it excites me. I have absolutely no idea where it's all going to lead, but I know where I'd like it to go, and by gosh, I'll do what I can, when I can to make that happen.

I hope to be found in a few local shops sometime in the near future and to have an increase in merchandise in my shop on a consistent basis.

here's to reaching for the stars!

And I ask you....do you have any must reads you can share with me for inspiration, guidance, etc? I've found Craft Inc to be such a valuable asset, I've learned so much!

Cheers,

A Little Bit

Wednesday, September 1, 2010

Things are getting a little "girlie" here in the elliven studio!

You know, it's funny that I should have three boys, since pink is by far my favourite colour! Oh pink, how I adore you. Not only do I love pink, but I also have a love for tulle. I had extra tulle added beneath my wedding gown to give it more volume and I just love the custom tutus that you can buy for dress up,

it's just so fun

Well, I've had this idea for quite some time, and was finally able to test it out today.


So far, I'm thrilled with the results! There is still a little tweaking that needs to be done, but all in all, I'm a happy camper! I will also have to figure out how to photograph them, the tulle doesn't show up if there is too much light. Hmmmm

I think they would be great cards to give after a baby shower, wedding shower or to that special girlfriend!

This look will also be used on my receipt/coupon holders as well as other accessories. I'll let you know when they are available (a good reason to follow me here on the blog and on twitter...). Speaking of my fabric accessories, please know that I have a whole slew of them in the works. I'm working on them every night and hope to have some new ones listed by the end of the upcoming weekend.

Cheers,
 

© 2010-2014 Julie Shaver. All Rights Reserved. | Policies | Blog Design By Brittany Douglas