Summer Holiday Go To Beverage. Strawberry Daiquiri!

Monday, June 30, 2014


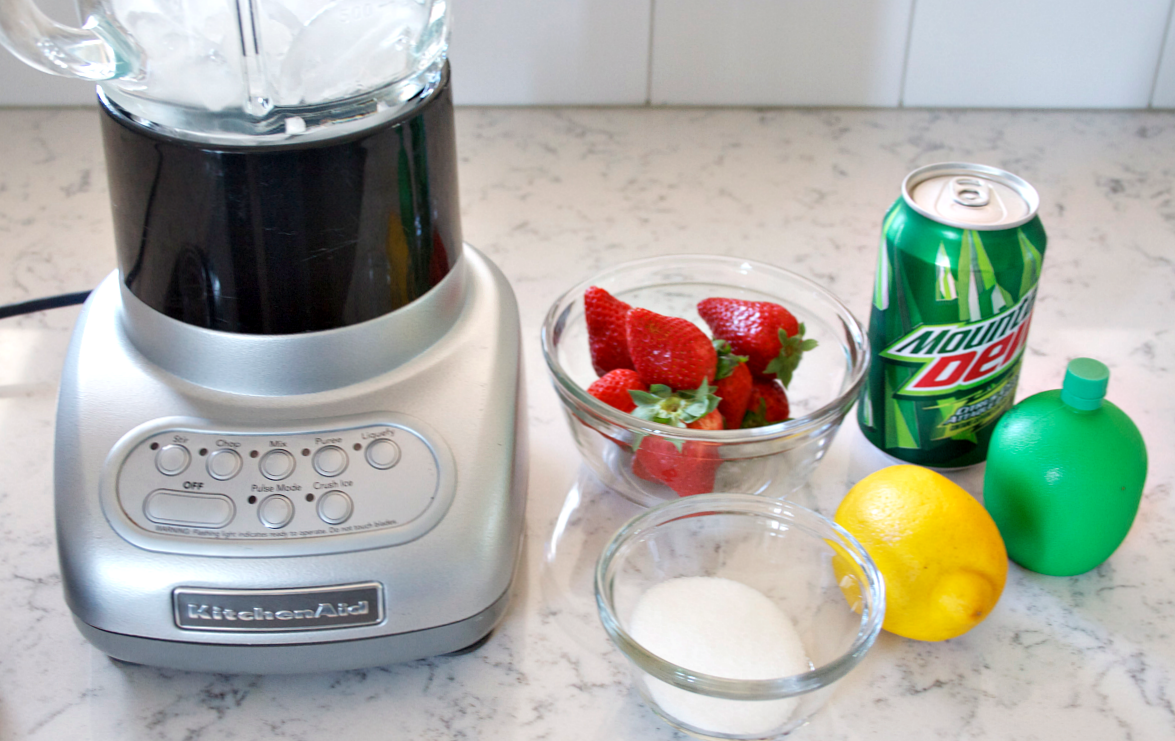
I've been a huge fan of strawberry daiquiri's for as long as I can remember.  With or without rum, they are delicious!  I've never really made them at home, which is so silly!  So a couple of weeks ago I decided to look for a recipe to try and the first one I tested was a hit!  So so so delicious.

With Canada Day and July 4th right around the corner, I thought it would be fun to share this recipe that made my Strawberry Daiquiri loving self chug-chug-chug (no rum was in this drink, no worries).

I used this recipe which I found on Allrecipes.com, it's my go-to site when it comes to recipes.  I love Pinterest just as much as you, but I really love Allrecipes.com.   We just happened to have Mountain Dew on hand, so I used it as the lemon-lime flavoured carbonated beverage.


I hope you find it just as tasty as we did!  What I love about this site is that you can adjust the serving size.  Just plug in the number of servings you are wanting to make and voila!

Have a fantastic day, friends!

Cheers,

Pretty Friday. A Parisienne Inspired Home Office

Friday, June 27, 2014


You can view more of the stunning space here.

We are officially done school for the summer break, which means that the summer slow down here has begun.  I will still be posting on a somewhat regular basis (covering my butt there incase I don't/can't lol), but email returns, etc. may not be as swift as they normally are.

Have a lovely weekend, friends!

Cheers,

#DIY Water Plant and Family Room Sneak Peek!

Wednesday, June 25, 2014


If you're following me on instagram or twitter, than you have already seen a few sneak peeks of the family room progress.  This room has definitely been troublesome for me.  I've had so many different plans for it and none of them ever stuck.  And you know what....thank goodness for that!

If you told me that in the end, the tv would be on the long wall, I wouldn't have believed you.  I did not see this coming.

Anyhow, long story short...the plan is in place, the plan is fabulous and I'm one happy camper!  I'm super excited to have this room so close to being done.  That's correct, it's almost done.


The huge pieces to the puzzle were picked up last week.  Two dressers from Ikea, which are now flanking the fireplace.  Oh goodness, I loooooove it!  So of course, the next step is styling the tops of these glorious, oh so perfect, made just for this space, dressers.

I thought that this would be the perfect opportunity to try making a water plant arrangement.  Lindsay and Holly got me hooked when they did this with their tulip & paper white bulbs in the spring.

So, I picked up a cheapo-weapo money plant from Walmart and dug out the decorative rocks and sand that I've had stashed away forever.  (I'm going to throw a disclaimer out there.  I have no clue if this is the way you're supposed to make a water plant, I'm just going for it and hoping it all works out.  So please do keep that in mind if you give it a go). 

Okay...on with the show.  The pieces to the puzzle: rocks, sand, plant and glass vase/container to put them in.


You'll need to remove all of the dirt from the roots.  Be gentle, those roots are pretty delicate.  I placed a bowl in the sink to catch all of the dirt.


After rinsing the roots under the tap, I placed the plant in a bowl full of water to wash off the rest of the dirt.


Then you're left with this:


I thought adding sand would help fill up the vase a bit, I think I used a little too much, but I can always remove a bit when I go to change the water.


I gently placed the plant on top of the rocks and I did spread the roots out and also positioned a few below the rocks to help stabilize it a bit (not sure if that's a good idea or not and yes, I most definitely do have a pink watering can!).


Slowly add some water so that you don't disturb the sand or plant too much.


And here it is all done and in it's place.  Now, I'd looooove to show you more of the dressers and this corner, but I won't for two reasons.  1- I want to save it for the family room reveal post and 2- it's still not finished (notice the art, I still need to buy a new mat and hang it up.  I promise I will show you the full deal soon.


I love how light and airy this feels vs placing the plant in a pot.  Turns out that there were three different plants in the one I bought, I discovered this once I started washing the dirt away.  So you could make more than just one.  I chose to keep the other two in a pot and placed them in the kitchen.

Cheers, 

Blogger Feature: Jenny from Crazy Style Love!

Monday, June 23, 2014

Attending BlogPodium last year was the beginning of something pretty awesome.  The sessions were amazing, but even better was getting to meet so many bloggers that I'd admired for some time.

One of those amazing bloggers was Jenny from Crazy Style Love.  You guys, this girl is so unbelievably fashionable and it was such a pleasure to meet her in person.  She is so kind, smart and down to earth...really and truly beautiful inside and out.

I totally admire Jenny's ability to pair pieces and how she plays with colour when it comes to fashion.  Her shoe collection is beyond admirable and goodness, I'd love to own every single one of her stunning skirts (you'll see what I mean)!  Jenny's signature feminine style is elegant and tailored, both of which I love.  She knows how to make a statement without going overboard.

Needless to say, I'm super excited to feature Jenny on the blog today!  You guys need to know her!

First, please tell us a bit about yourself and your blog:  
My name is Jenny, and Crazy Style Love is where I share all that I love, from fashion to food to design.  I live in Toronto, Ontario, and love spending my weekends exploring this fabulous City.  Fashion plays a huge role in my life, and I'm always on the hunt for the perfect pieces to add to my wardrobe.  I cherish my collection of handbags like they are family, and the more sparkly the necklace, the better.  I spend way too much time on Instagram, and love taking/styling photos.  Crazy Style Love (and my Instagram feed) truly represent my style, my loves, my passions, and my life.


Is there one store that you know you can always count on for having that perfect piece?  
It's hard for me to leave Anthropologie empty handed.

Which accessory would you not dare to leave the house without?  
Sunglasses.

What would you consider to be the perfect outfit?  
A colourful dress or midi skirt, simple pumps, oversized sunglasses, a statement necklace and a fabulous handbag.


Is there a colour combo that you absolutely love?  
I love all colour, so it's hard for me to narrow down one combo, but black and white with a pop of colour (like pink or yellow) is a go-to pairing for me.  I'm also currently loving light washed denim with white and blush pink.  It feels so summery.

Fiction/Non Fiction person's wardrobe that you would love to call your own? 
Miroslava Duma.  Her wardrobe is insanely gorgeous.

Is there a piece that you dream of owning?  
An Hermes Birkin.  Definitely a dream.


Coffee/tea?  
Neither, I dislike both. I know, shocking, right?!

Hamburger/Pizza?  
That's a tough one.  Both?!  But if I had to pick, I'd say a thin crust pizza.

Chocolate/Cake?  
Chocolate . . . always chocolate.


So fantastic, right?!  You can find Jenny's blog here.  Her instagram feed is to be admired as well!  You can find it here.

A huge thank you to Jenny for taking part!

Cheers,

Pretty Friday: A Caitlin Wilson Kitchen via Rue

Friday, June 20, 2014

It's been quite some time since I last wrote a Pretty Friday post, so why not get back at it with a really good one, kay?

Caitlin Wilson is one talented lady.  Her textile's are simply amazing and her designs are beautiful. 

Rue Magazine recently shared some amazing photos of this kitchen by Caitlin.  I'm in complete awe, it's perfect!  You can see more photos here and you can also read about her design process in this House Beautiful feature.

Goodness, this cold really has been brutal.  I'm feeling much better but still have a lingering headache.  I finally went to see the doctor yesterday because two of the kids have sore throats and hubs now has it.  I wanted to make sure that it wasn't strep, which it isn't.  Phew.

Hopefully everyone will be feeling better after some rest this weekend.

Have a lovely weekend, friends!

Cheers,

The Complete Guide to Modern Chairs by One Kings Lane

Tuesday, June 17, 2014

A little while back, I was asked by Chloe, from the amazing online shopping site One Kings Lane, if I would be willing to write a post about a statement chair in our home.  The purpose of the post was to help them celebrate the launch of their Complete Guide to Modern Chairs.

Though the chairs I've chosen to feature in this post aren't modern, I still said yes.  Reason being that when it came time for us to select chairs for the living room, we didn't realize how many options and styles there were and how little we knew about what it was that we wanted let alone how to choose the right one!   So to have a resource guide to refer to is so fantastic! I also personally love to read about the history of pieces, how they evolved, where they came from, etc.  So it's not only an informative read, but it's also so interesting!

The team at One Kings Lane has divided the guide into 9 sections, covering chairs from the Pre-Modern era to the modern chairs of the 21st Century.  You'll probably starts recognizing more of the chairs in section IV. The Chairs of the Bauhaus, on.

So, which chair did I choose?  Any guesses?

If you said our Restoration Hardware bergere chairs in the living room, then you're right!

Why did we pick them?  These chairs were high on our list from the beginning.  The black frame tied in with the black chandelier and mirror that are in the dining room, which is open to the living room.  The size was right and the frame was undeniably gorgeous.  We chose to go with a neutral linen finish 1- to save on cost (truth) and 2- because they are user friendly and tend to wear well.

We loved that they provided comfort to the person sitting on them and that they were also kid friendly (necessity in our house). Though they are light, they are easy to spot clean and the seats are slipcovers.  Because we chose to stick with a neutral fabric, they would go with any decor.  Since we move so often, this is super important.  We never know what our next home will look like or what rooms we will have.  So we need furniture that we can easily work with.


So back to the Complete Guide to Modern Chairs.  How would it have helped me if I was choosing a modern chair?

I would be able to read the guide and pinpoint what characteristics the chairs from each era had.  That would allow me to narrow down where and what to look for.

I would also have the designer's name or the name of the chair on hand.  This would simplify the search enormously!  Goodness, I had to find the name of some chairs that were on our list in such a round-a-bout way!  This guide has many of the names listed for you....bonus!

I honestly can't stress how important it is to have this information before you head out to buy your furniture.  It's really great to educate yourself on what's out there, to find out what it is that you are really wanting, needing and looking for.  This will enable you to make an informed decision when it comes time to purchase vs one based only on aethestics and price (which are obviously super important).

The guide is also fantastic as it will allow you to see just how many options are out there vs just going to a store and selecting something from their floor.  It really does pay off to take the time and research what it is you are looking to purchase, because chances are, there are way more options that you can even imagine.

You can find the guide here.  And while you're at it, there are some other really great guides which can be found here.

Cheers,

Just Call Me #GirlBoss

Monday, June 16, 2014

Last Tuesday evening, I started feeling like I was getting a bit of a sore throat.  By Wednesday afternoon, I was crawling into bed feeling like I'd been hit by a truck.  I never nap, it's not in my DNA, it's like I'm allergic to napping.  So the fact that all I wanted to do was to lie in bed all day, was a pretty big deal.  Here we are, nearly a week later and my ears are still ringing and my throat is still sore.  But I'm functioning like a normal human being and that my friends, is a pretty awesome feeling.  Man, what a cold that was.

One upside to being sick is that you literally have no choice but to slow down and take it easy.  Well, as much as you can when you're a parent (I'm so thankful that hubs wasn't away on a trip, so that I could rest up for the most part).  Anyhow, a few days earlier I hard ordered the "hey I'm all over instagram and instagramers don't lie when they say a book is good, so you better buy me" book #GirlBoss.


I wasn't too sure what to expect because truth be told, I wasn't even sure who Sophia Amorusa was.

Done gasping?

It's true though, I didn't.  Low and behold, she is one of the most successful entrepreneurs eva!  And well, she's pretty darn awesome and I mean pretty darn awesome.

Her book is pretty much her story, she doesn't hold back, she has no excuses.  She has worked hard, she has figured it out along the way, she has made mistakes, she has taken chances and she is a #GirlBoss.  What I loved the most about this amazing read is that she really stresses how hard one has to work if they really want something.  There is no easy road, but there's a way to get what you want.  Hard work always pays off in some way or another.  I also loved how she doesn't apologize for not always fitting in, that she had the confidence to continue and push even though she didn't always fit into "society's mould".  If something didn't work for her, she figured out how to make it work or why it didn't work and tweaked it accordingly.  She doesn't settle.

It was truly an inspiring read.  I could relate to so many points she made, it was almost unreal.

So if you're looking for a little inspiration, take a peek at her book.  It may be just what you need to give you that little nudge to go for your dreams.

Cheers,

Canadian Living July Cover Recipe: Grilled Peach Melba Sundae

Friday, June 13, 2014

Here's what you're going to do.  You're going to grab a piece of paper & a pen or pencil and you're going to write the following:

Note to self

Done? Awesome. I promise, you won't regret it.

With that, it's time for me to share my thoughts on the Canadian Living July Cover Recipe.  Though you've probably already guessed that I loved it.

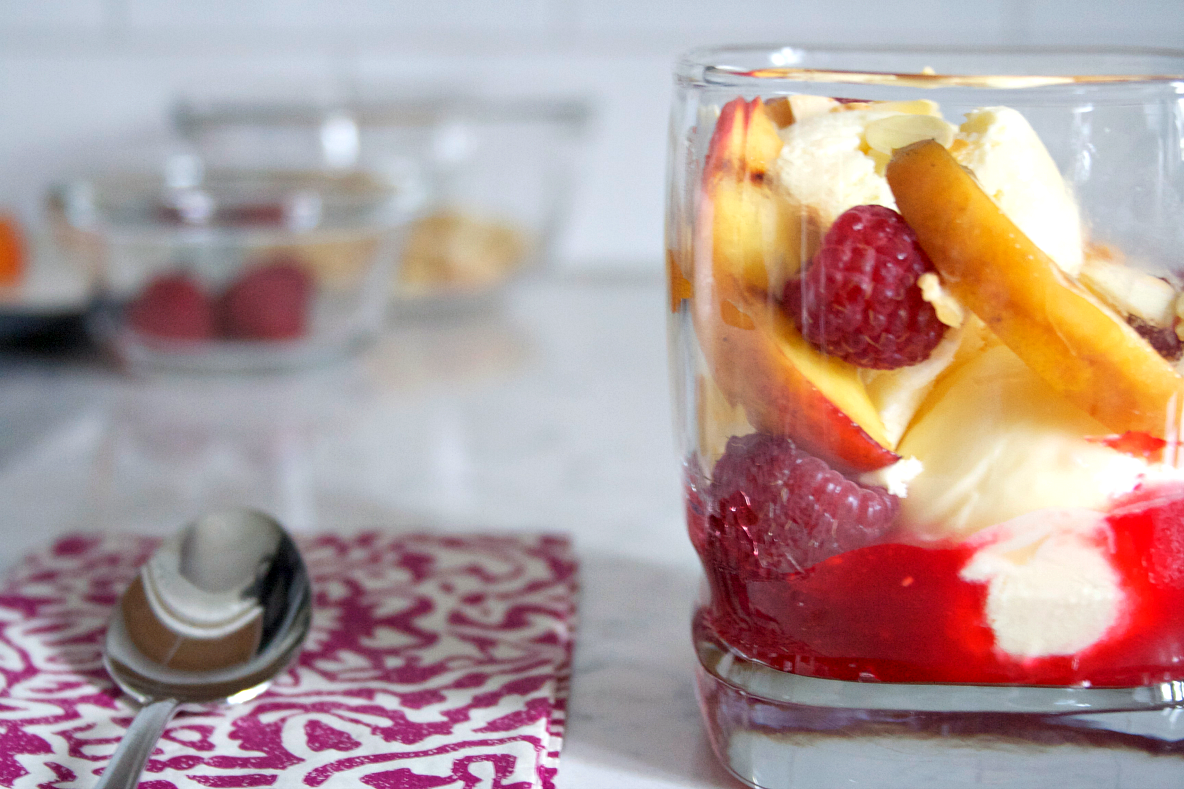
This fruit topped sundae pretty much had me using my finger to wipe the bowl clean.  I mean seriously!   What on earth?!  But it was so good, just so delicious.  I can assure you that the raspberry sundae sauce will be made again and why on earth have I never toasted almond slices before? They were the perfect crunchy touch to this sweet and tasty dessert.

Enough of me talking....just take a look at the end result:


Drool. A-way. 

Right?!  It's okay, I'm drooling too!

One more from the top:


The recipe was super simple and easy to follow.  Though I did miss the "peeled" part of the instructions when it came to the peaches.  Oops.

I chose to make the sundae sauce ahead of time, which is aok, just keep it in the fridge and it lasts for up to a week.

The sauce was really simple to make.  Some raspberries, lemon juice, sugar and water do the trick.


You then strain the mixture and discard the seeds with the help of a sieve.  Warm the blended mixture up, add some cornstarch and water, heat that up until it's a thick consistency and refrigerate until cool or until you need to use it.


I'd never made sundae sauce before and quite honestly, I probably wouldn't have chosen to make raspberry sauce for my first sundae-sauce-making adventure, but I was truly blown away by how absolutely delicious it was!  The ingredients just went together so perfectly, resulting in a scrumptious sundae topping.

The steps for making the grilled peaches were pretty straight forward, even though I totally missed the peel-them-before-you-grill-them part.


I threw the sliced almonds in a pan to toast them, so yummy!


Once the peaches have been grilled and the raspberry sauce has been chilled, you can then throw your sundaes together!


The end result is a taste-bud approved summer dessert.  I spent the next three days enjoying the leftover raspberry sauce over vanilla ice cream with some toasted almonds.  How could there be leftovers if it was so good you ask?  Well, it's because I didn't tell anyone that there were leftovers because I didn't want to share! ha!

I still can't get over how fantastic it tasted and can think of a million and one occasions that this summer dessert would be perfect to make.  It's even the perfect colours for a Canada Day treat!


Next time I would of course peel the peaches, but I would also grill them for a while longer.  Otherwise, I wouldn't change a thing!

You can find this scrumptious recipe here and read what other bloggers thought about it here!

Cheers,

sponsored post but opinions are completely my own
 

© 2010-2014 Julie Shaver. All Rights Reserved. | Policies | Blog Design By Brittany Douglas